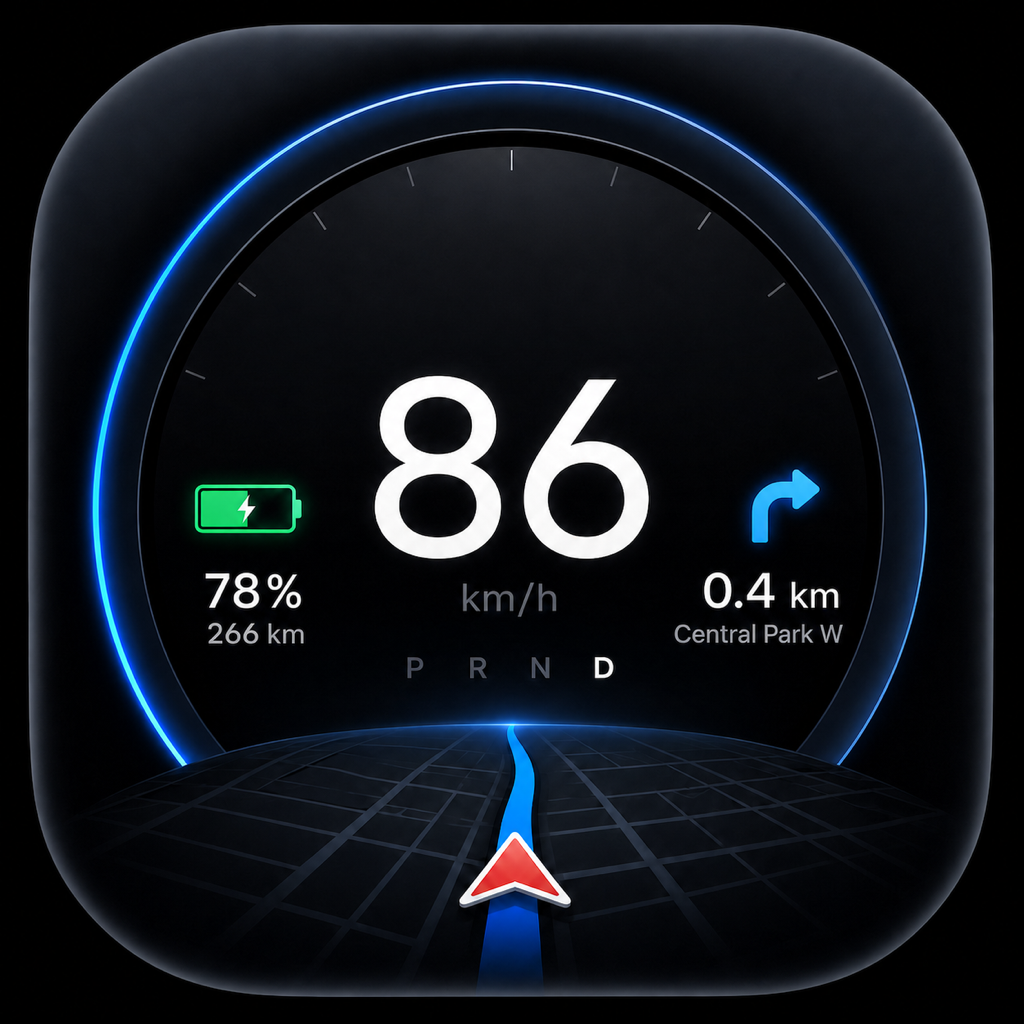
With 1.1.17 you build your own cockpit, block by block. On top of that come G-force, a Vehicle center, warning lights, a route overview and many wishes from the TFF Forum. Here you can see it all in order, with pictures and guides.
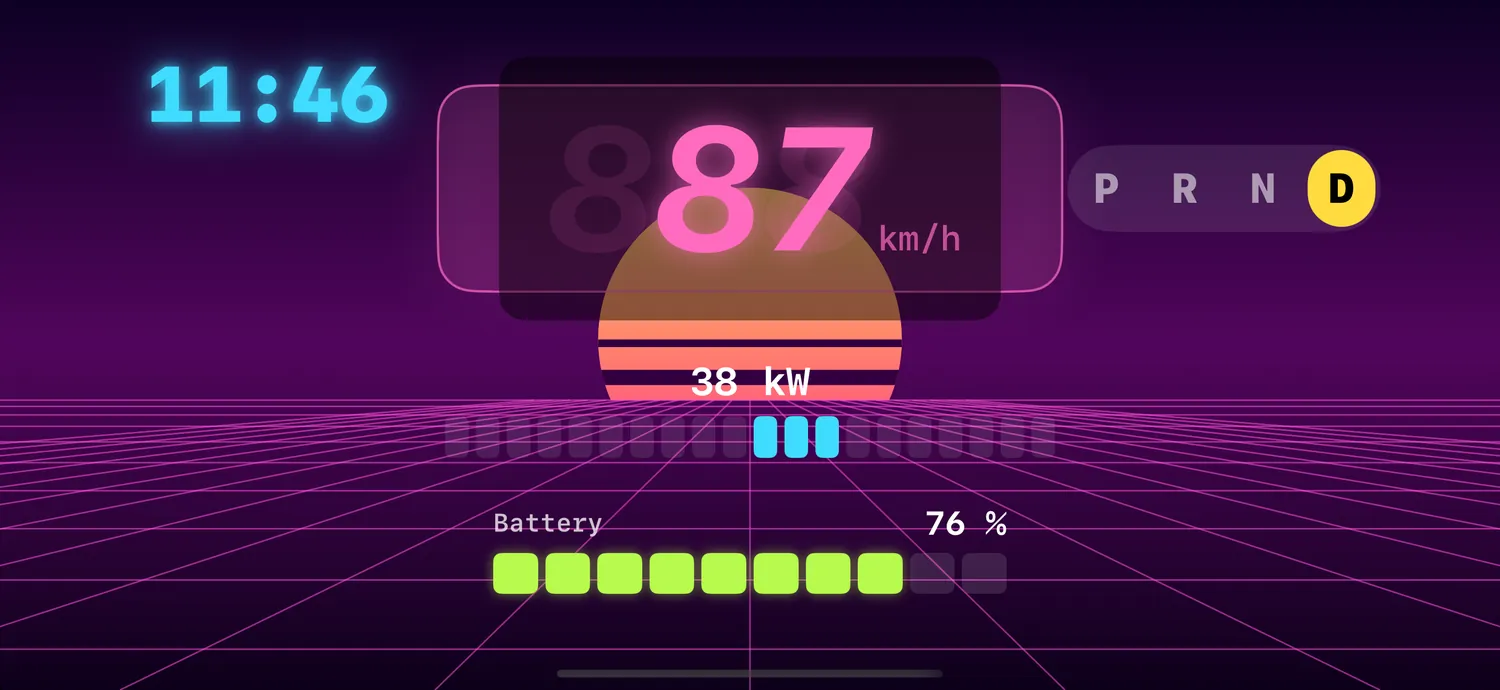
With 1.1.17 you build your own cockpit, block by block. On top of that come G-force, a Vehicle center, warning lights, a route overview and many wishes from the TFF Forum. Here you can see it all in order, with pictures and guides.
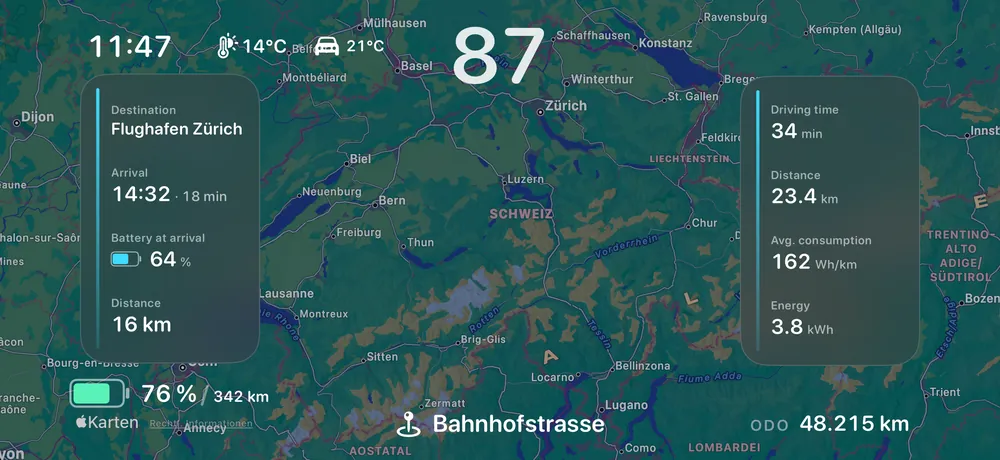
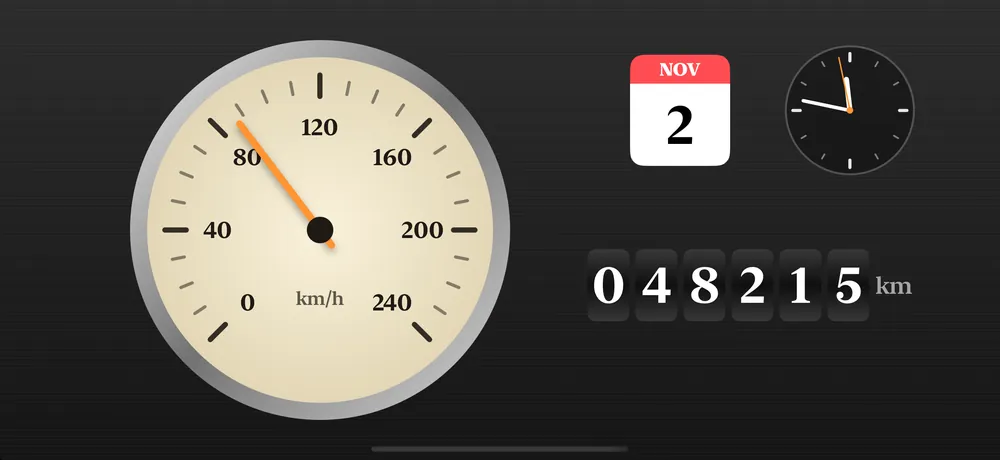
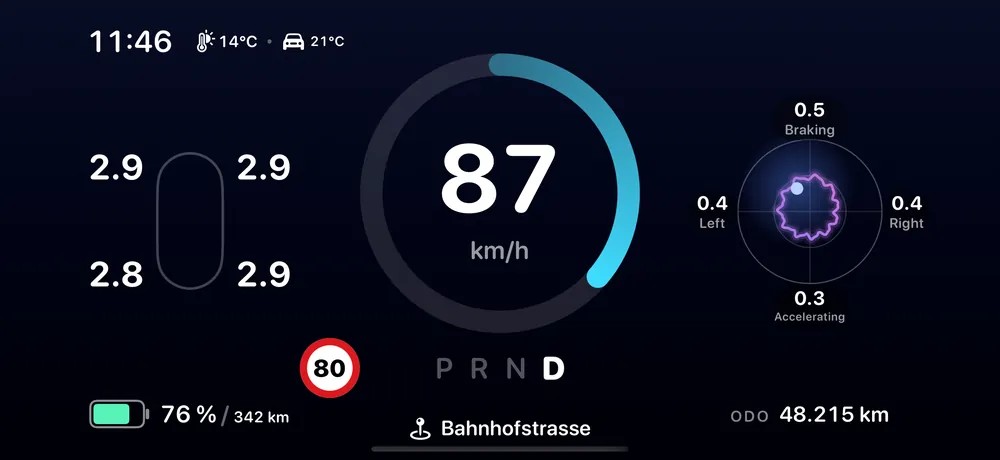
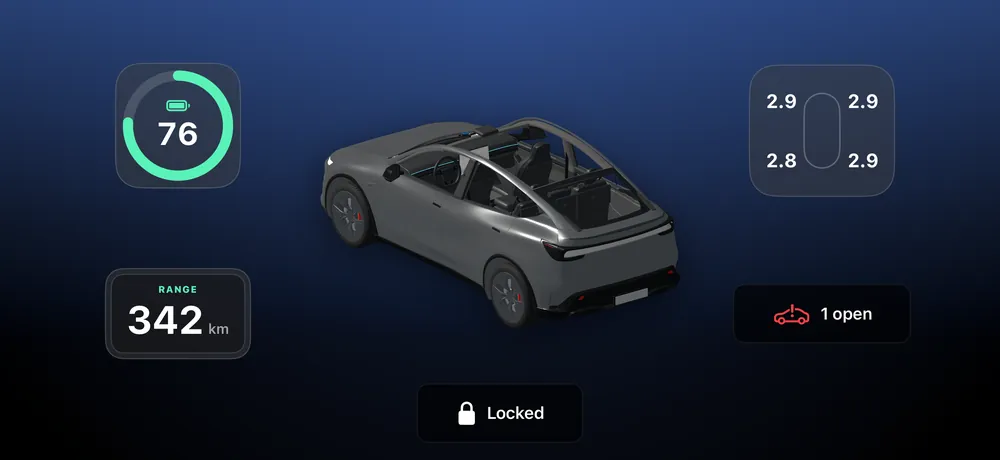
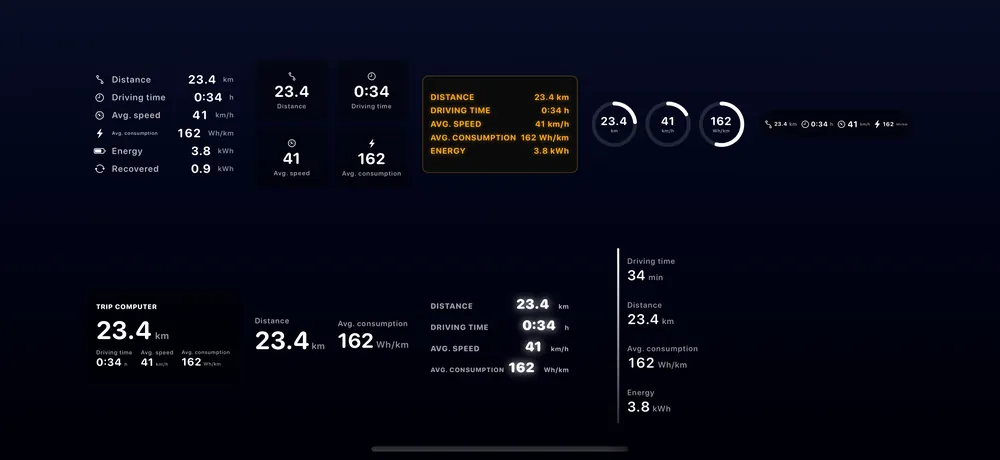
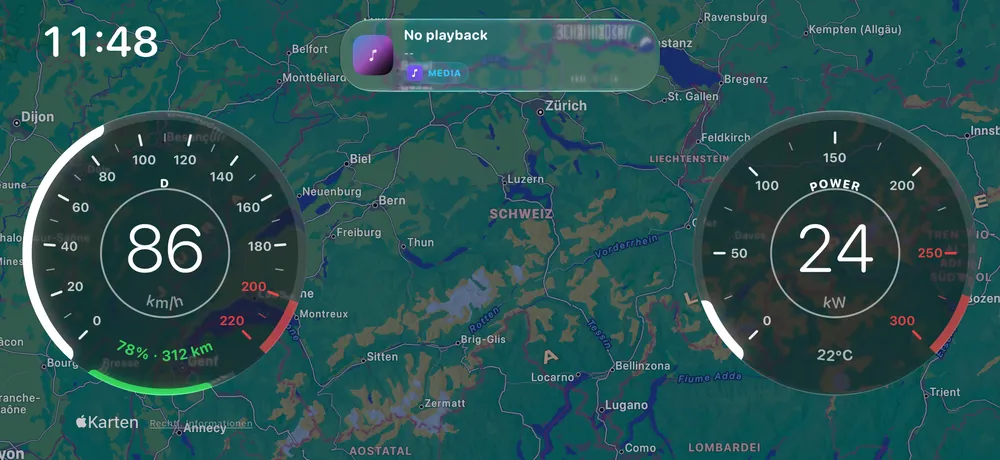
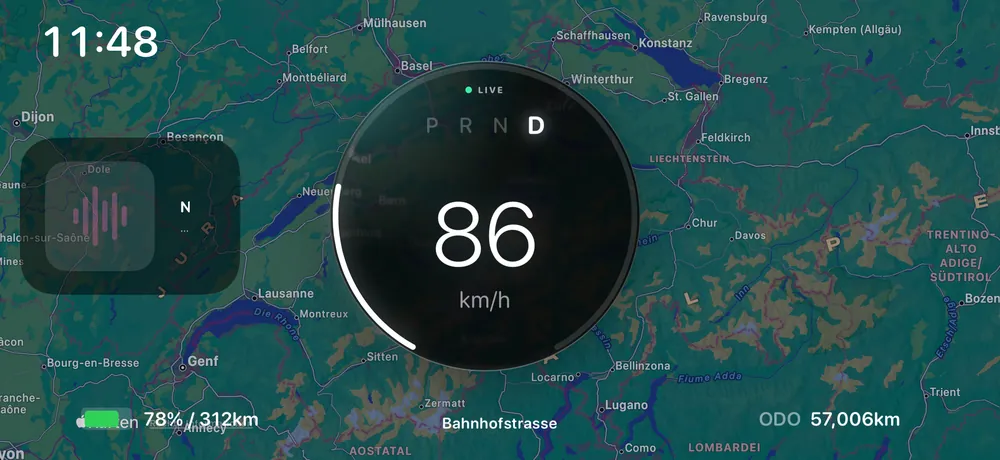
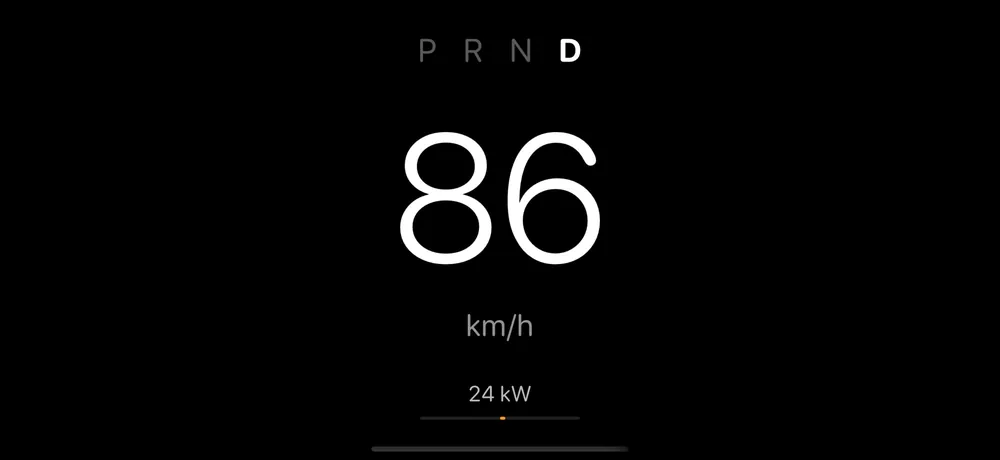
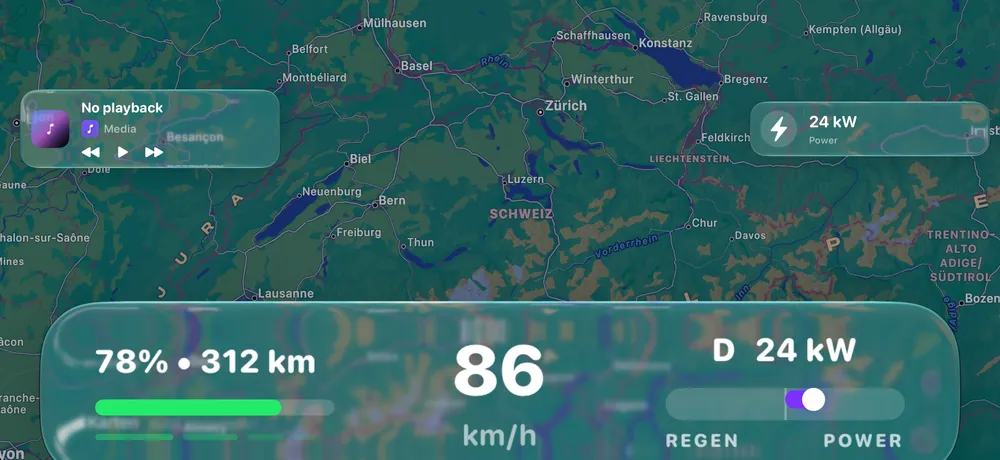
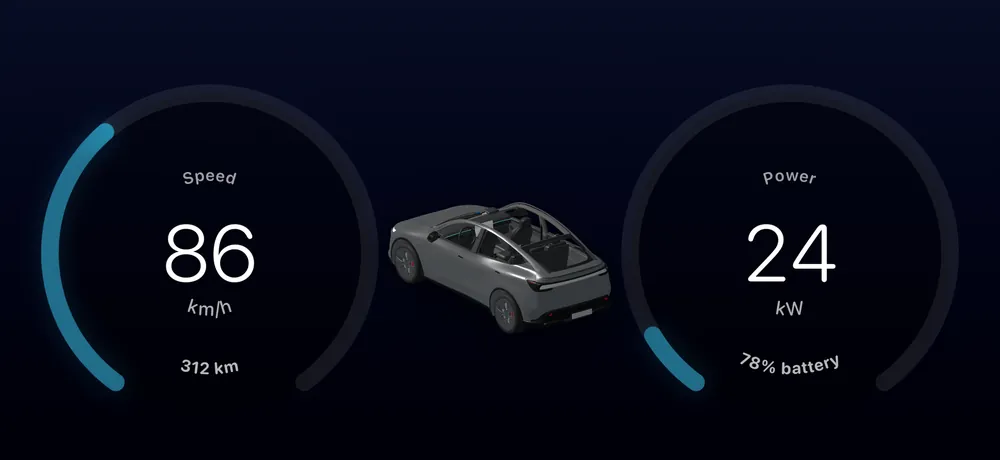
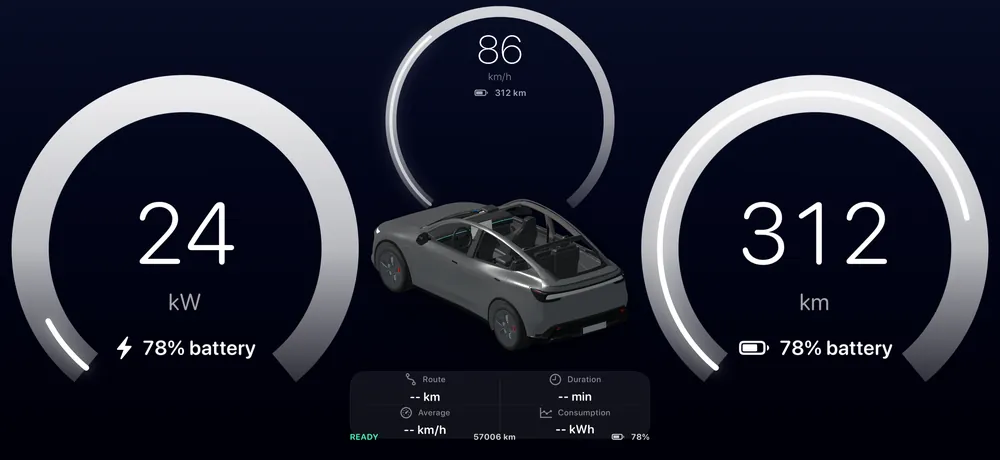
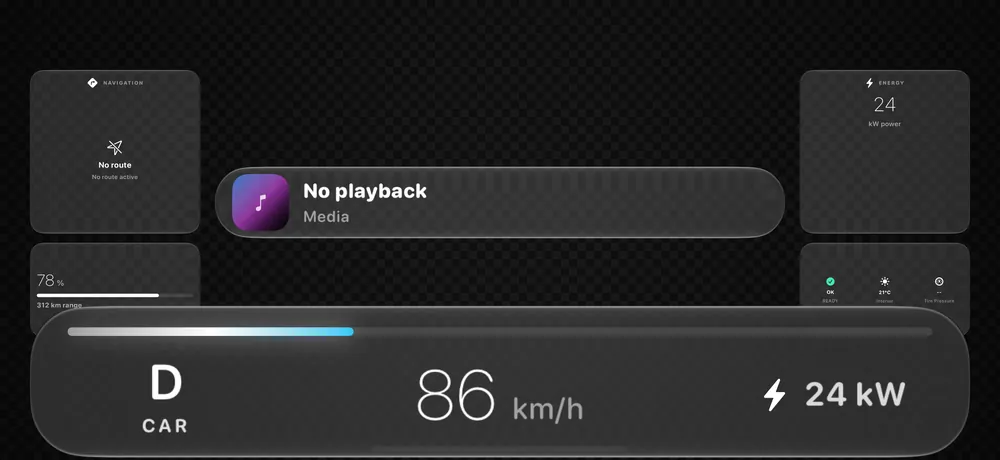
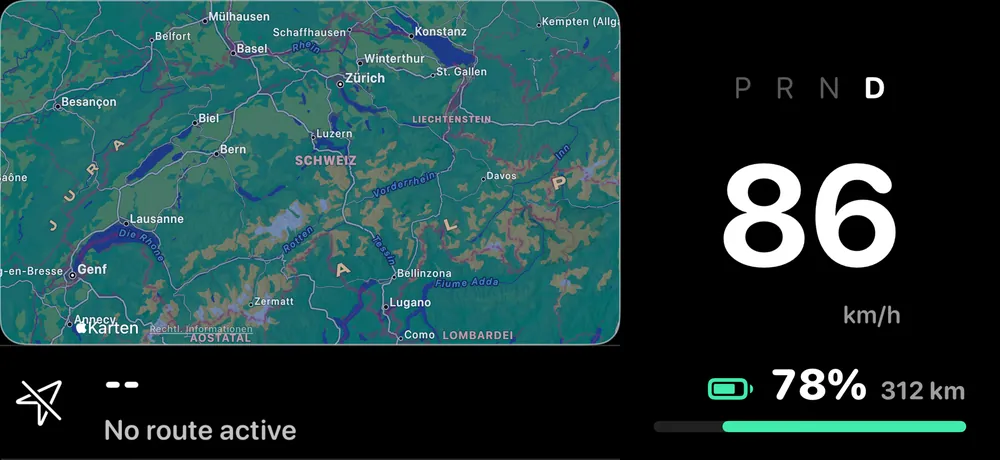
All of these cockpits are built from the same blocks. They are part of the templates included in 1.1.17.
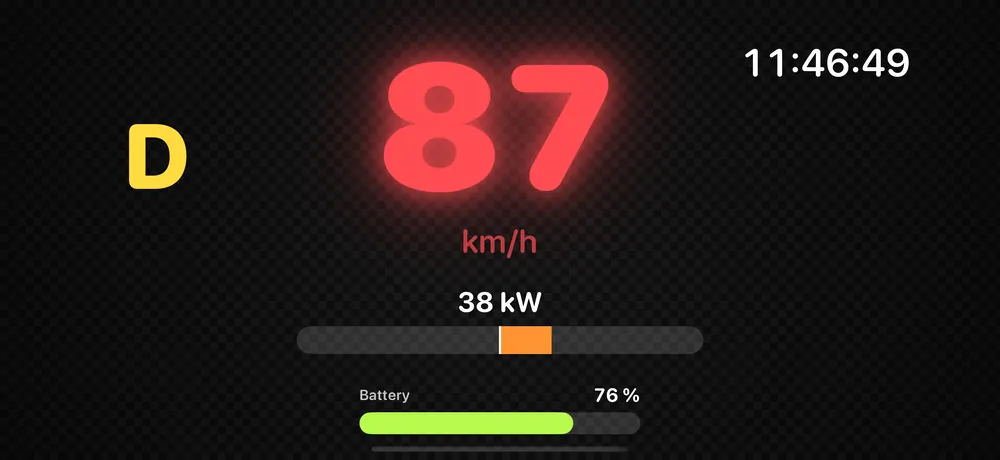
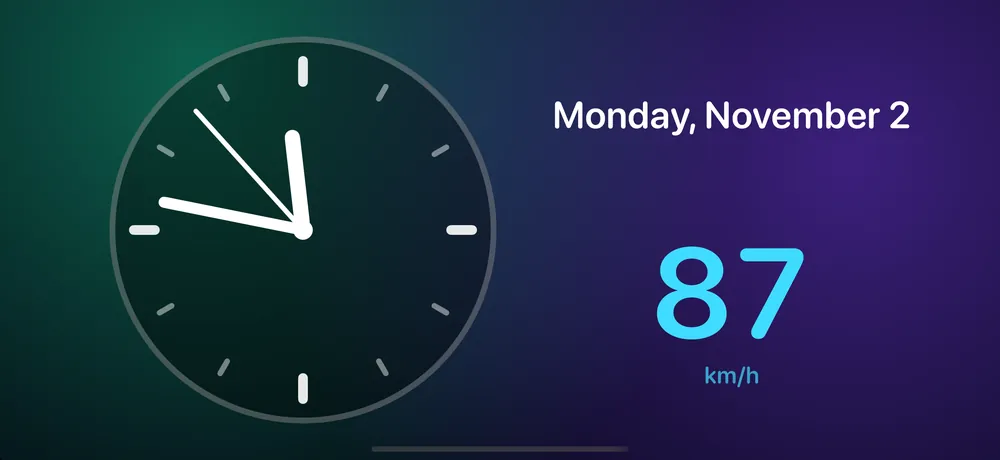
Your own cockpits
Until now you picked one of the 11 cockpits and adjusted it. Now you can build as many of your own as you like. You put on the screen only what you really want to see, exactly where you want it.
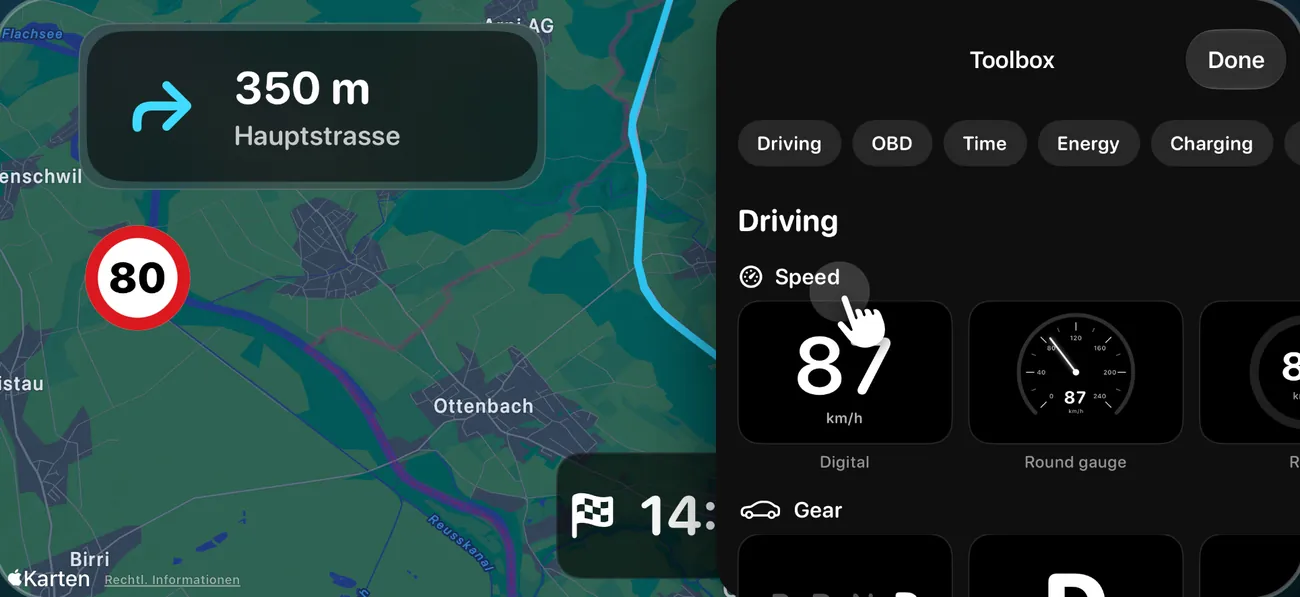
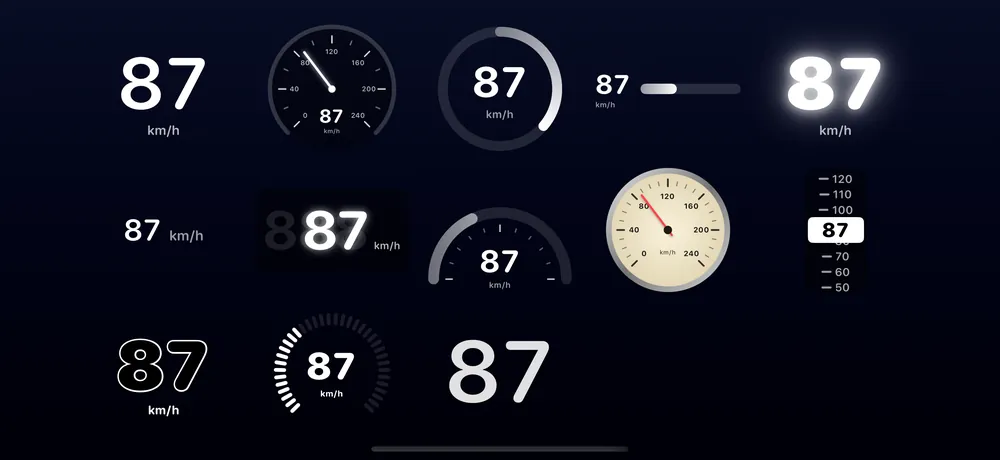
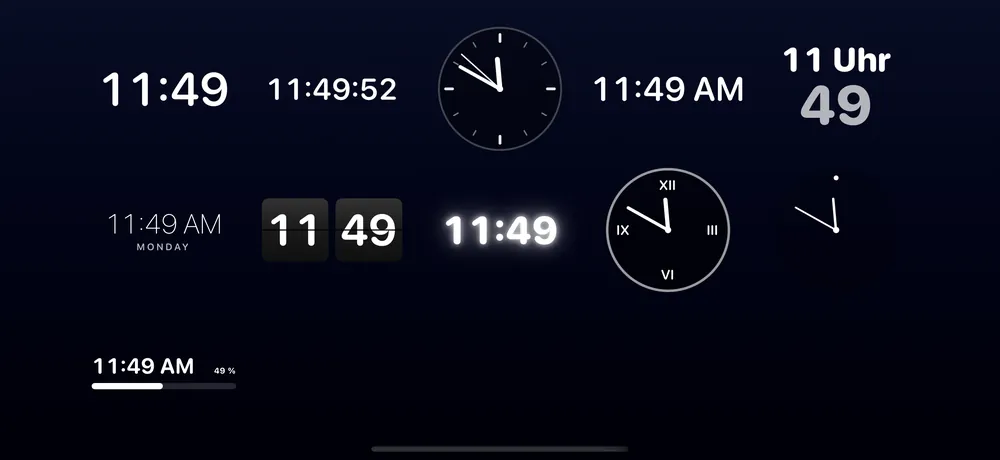
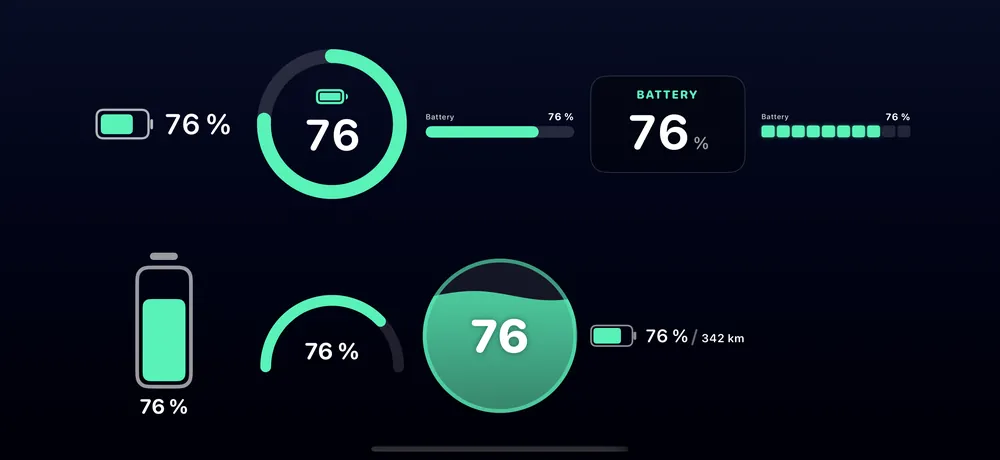
That's what the Toolbox is for. It contains 49 blocks in 10 groups: Driving, OBD, Charging, Time, Energy, Trip and climate, Vehicle, Map and navigation, Design and From the cockpits. Most blocks come in several looks, the speed for example in 13.
Your own cockpits are part of Tespit Premium.
Guide
It only takes a few minutes. You can change everything again at any time.
Step 1
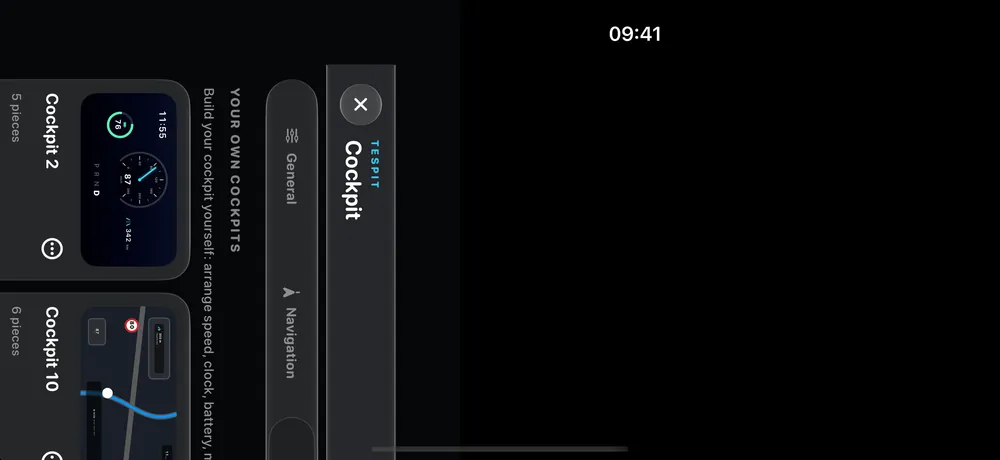
Open Settings and switch to the Cockpit tab. Under “Your own cockpits” you'll find your cockpits and the “Create cockpit” card.
Step 2
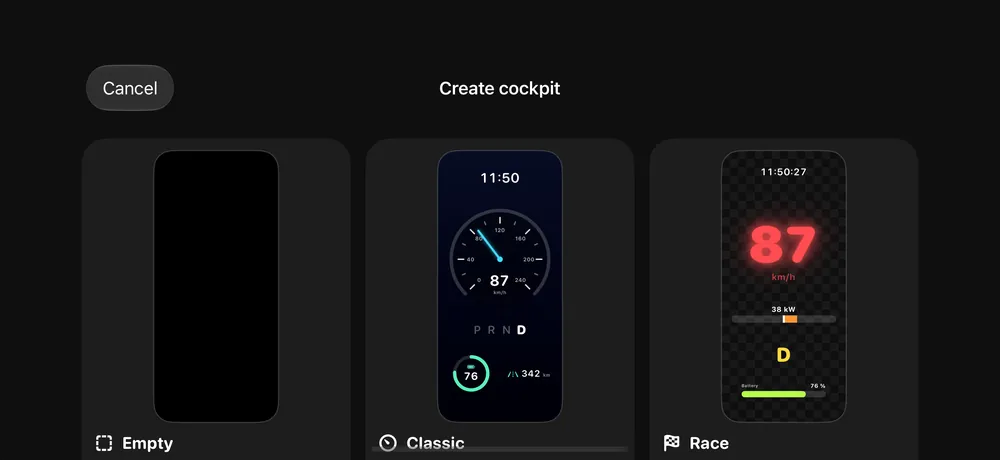
Tap “Create cockpit”. Choose a template as a starting point, or “Empty” if you want to start from scratch. The new cockpit opens straight away for editing.
Step 3
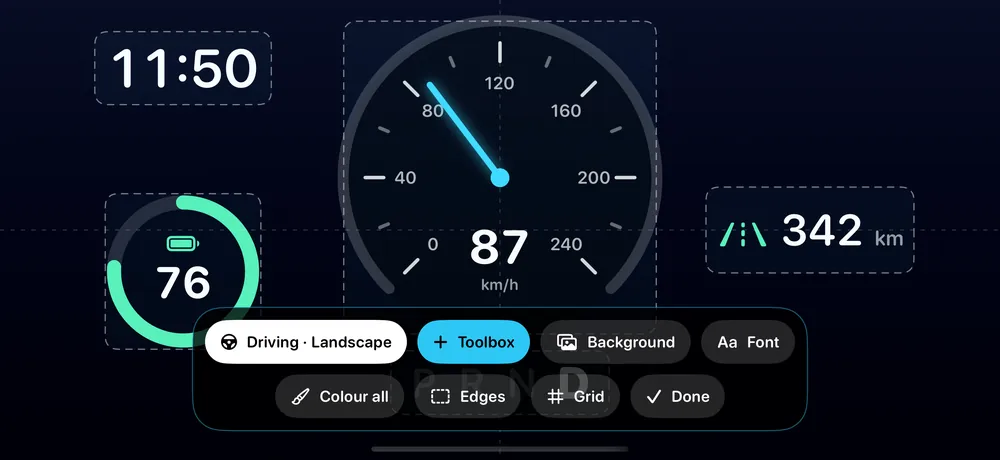
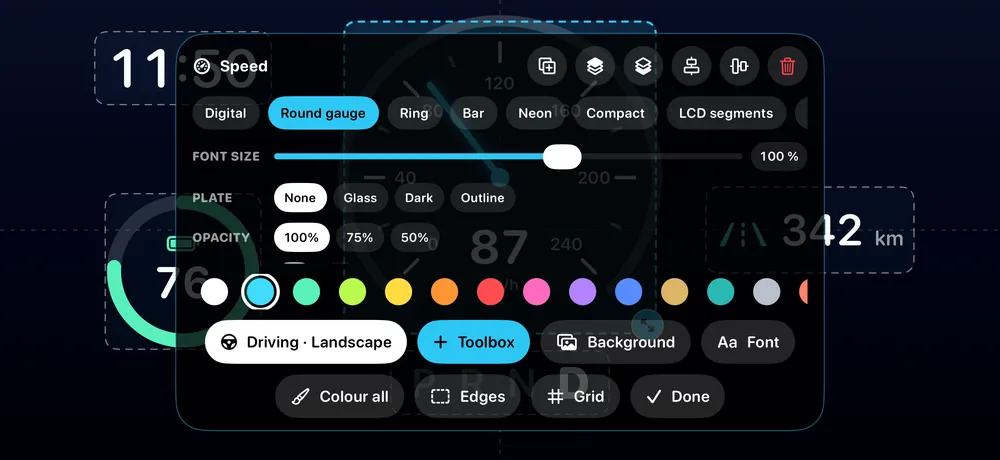
Drag a block into place with your finger. Change its size at the corner. With “Grid” everything snaps neatly into place, and guide lines and centring help with alignment. “Undo” takes back your last steps.
Step 4
Tap “Toolbox” and choose a group. Each block shows its looks as a preview. One tap places it in the cockpit. One 3D car is possible per cockpit.
Step 5
Tap a block. Now you choose the look, font size, backing, opacity, shadow, glow and one of 14 colours. At the top you can duplicate it, bring it forward or send it back, or delete it.
Step 6
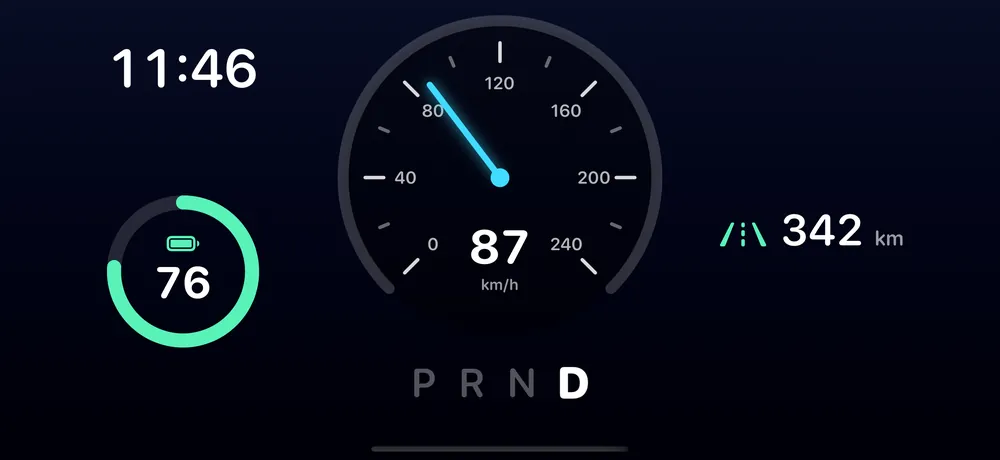
Under “Background” you'll find, for example, Midnight, Carbon, Synthwave, a solid colour or the live map. “Font” and “Colour all” apply to the whole cockpit. With “Ready” it's saved. Later you can change it via “…” on its card and “Edit”.
13 templates
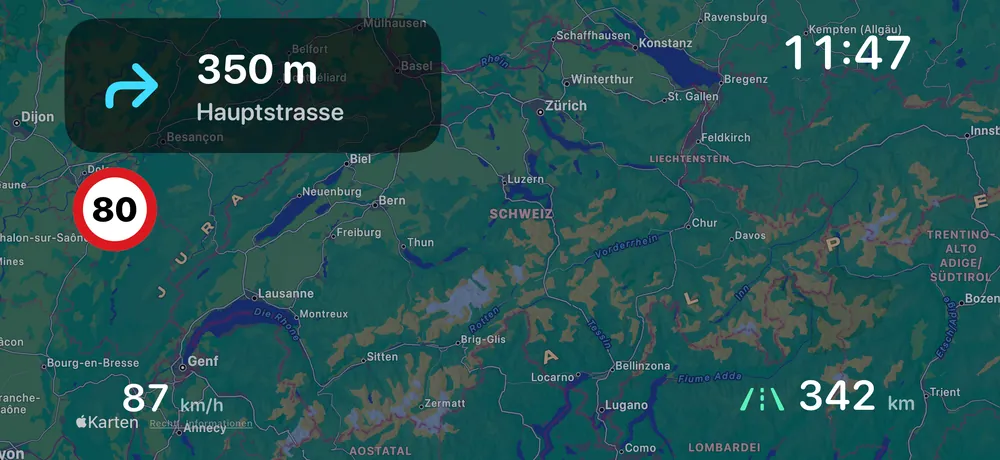
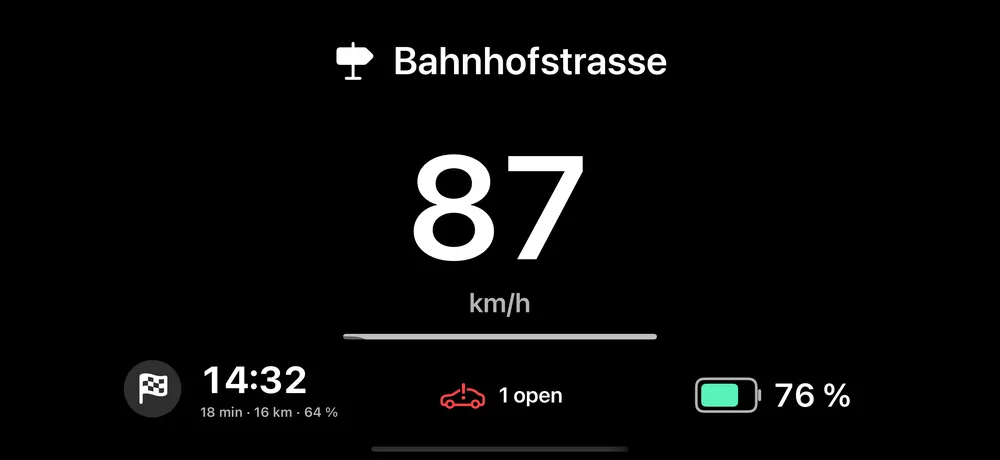
Every template is a ready-made cockpit that you can then change block by block. All templates except “Empty” also come with a matching charging screen.
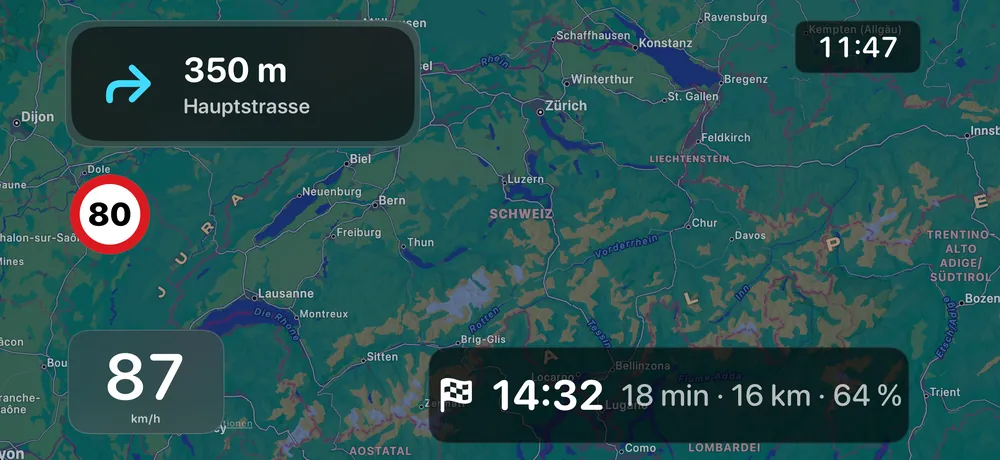
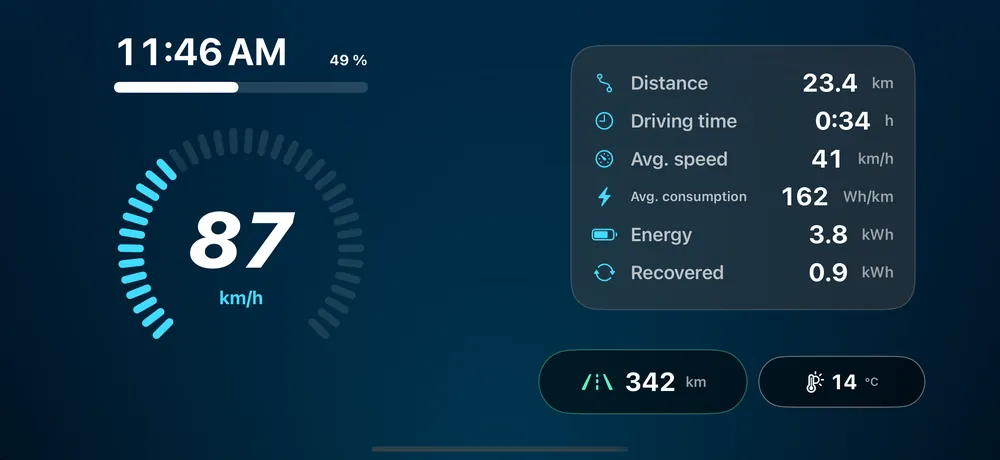
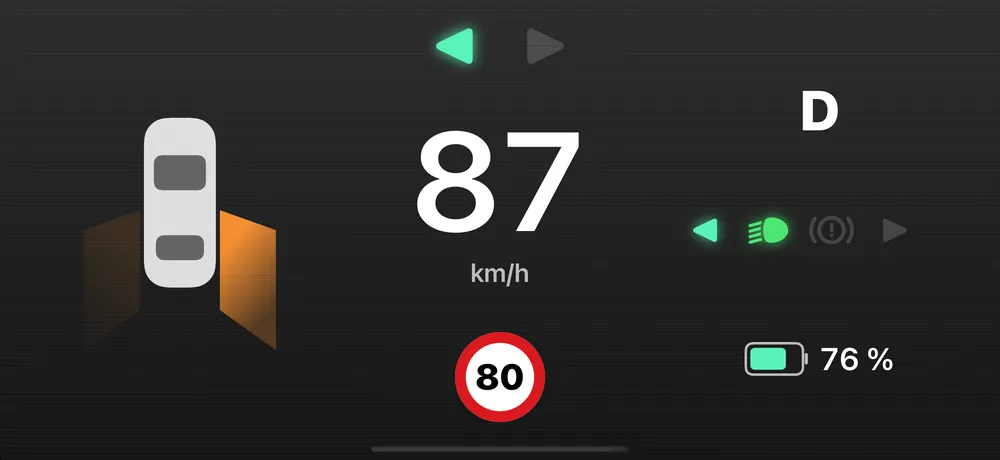
Copy the 11 cockpits
Each of the 11 cockpits can be copied to your own cockpits and freely changed there. The original stays unchanged. The elements of all 11 cockpits are also available individually in the Toolbox, in the group “From the cockpits”.
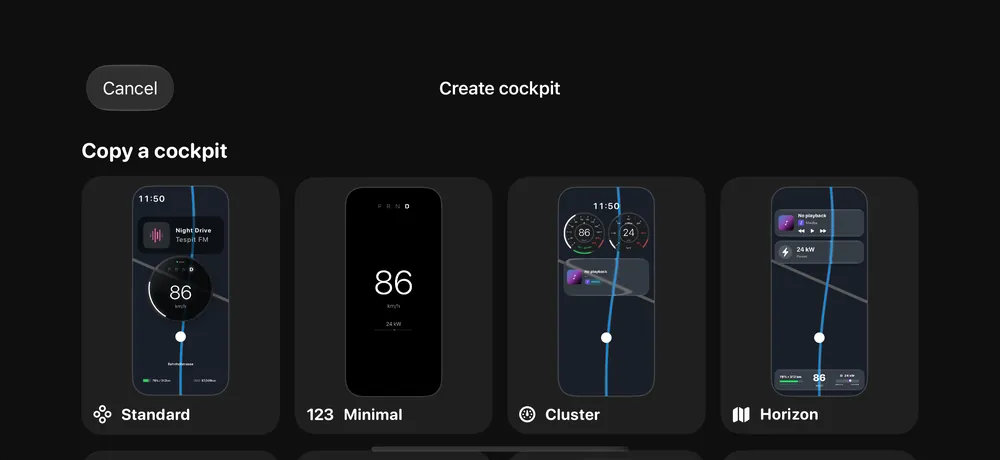
Step 1
In Settings under Cockpit, tap “…” on a cockpit card and choose “Copy to my cockpits”. Or use the “Copy a cockpit” section under “Create cockpit”.
Step 2
The copy opens straight away for editing. Move, add or remove things, just like in any cockpit of your own.
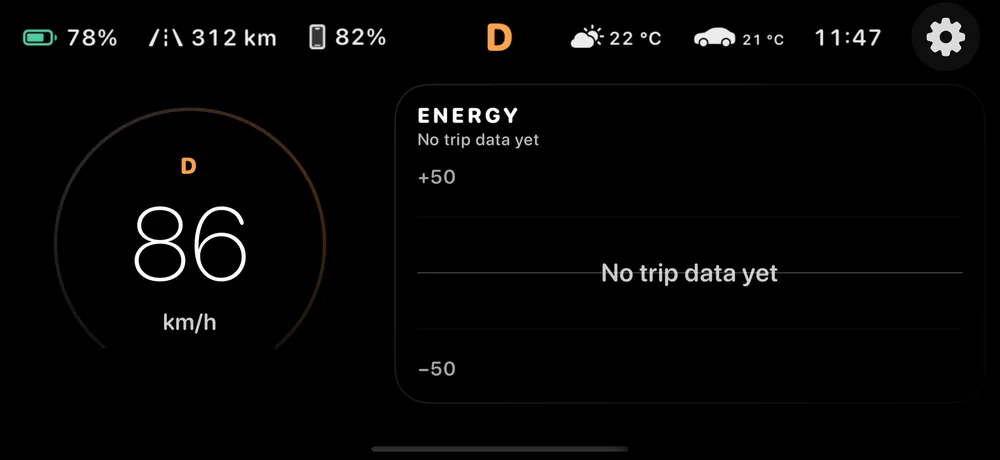
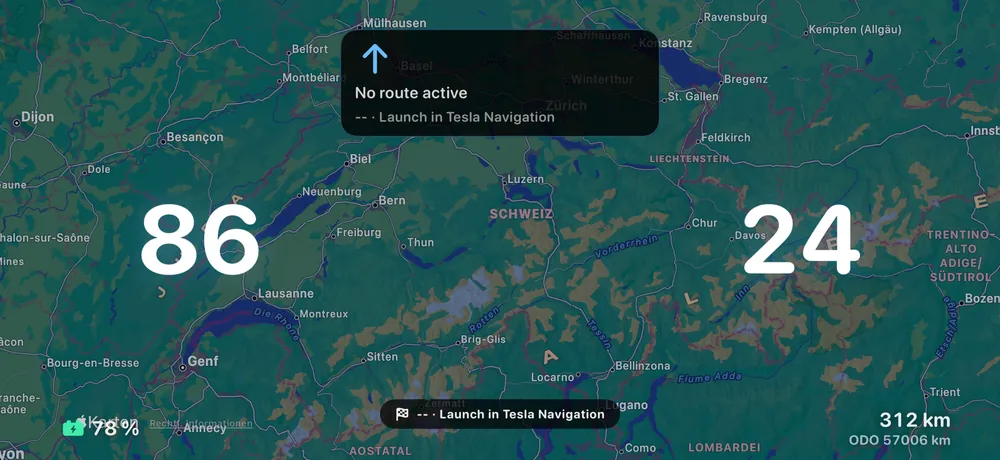
Four modes and charging screen
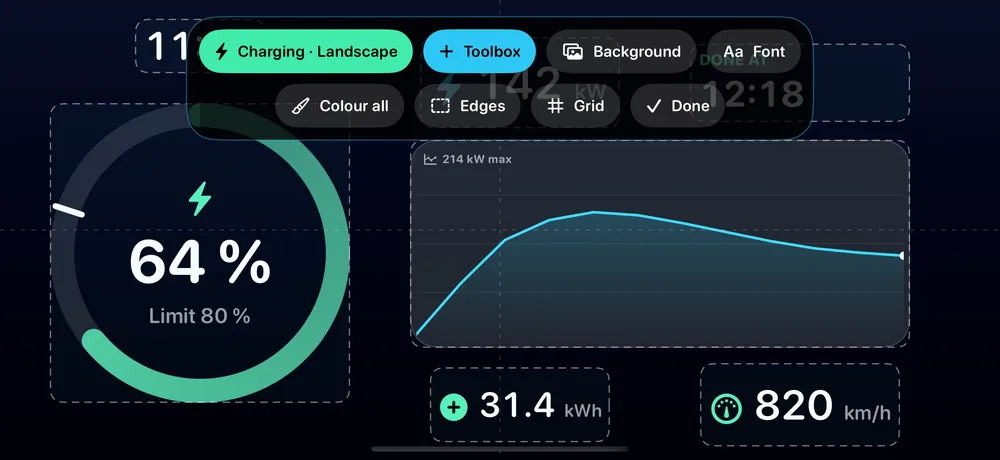
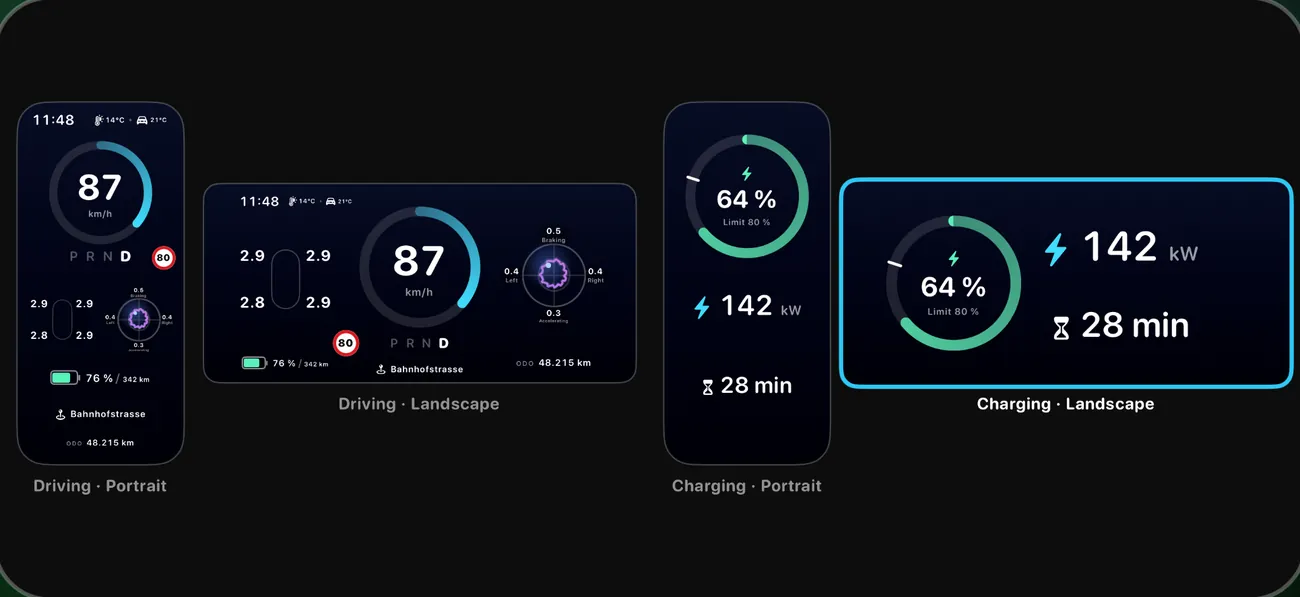
Every cockpit of your own has four layouts: Driving · Portrait, Driving · Landscape, Charging · Portrait and Charging · Landscape. While charging, the cockpit switches to the charging screen by itself. If it's empty, the driving mode stays on.
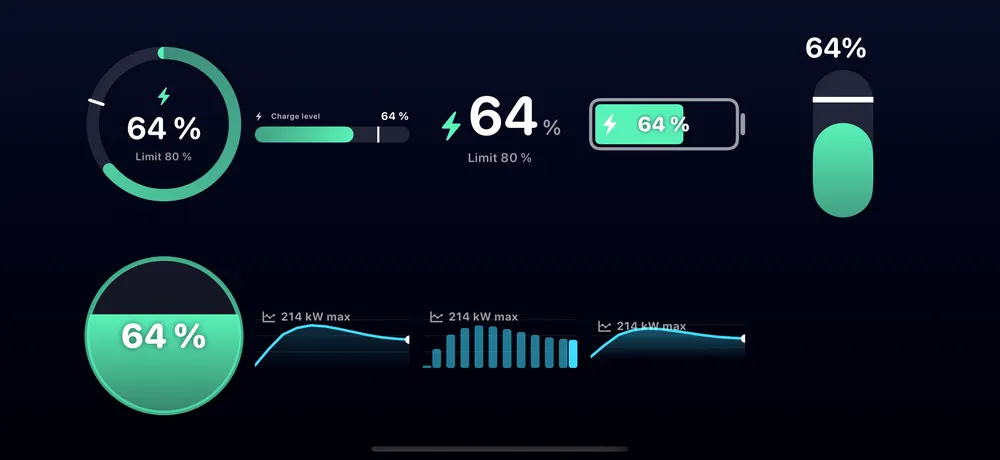
The Toolbox has a group of its own for the charging screen: Charge level with target, Charging power, Time left and “Ready at”, Added energy, Charge rate, Charging curve, and Voltage and current. Tespit only shows Voltage and current with an OBD adapter.
Step 1
In edit mode, tap the first button in the bar, for example “Driving · Landscape”, and choose “Charging · Landscape”. The app rotates by itself into the matching orientation.
Step 2
Arrange the blocks the way you know it from the driving mode. While nothing is charging, they show sample values. An empty charging screen offers you the Toolbox and the default charging screen.
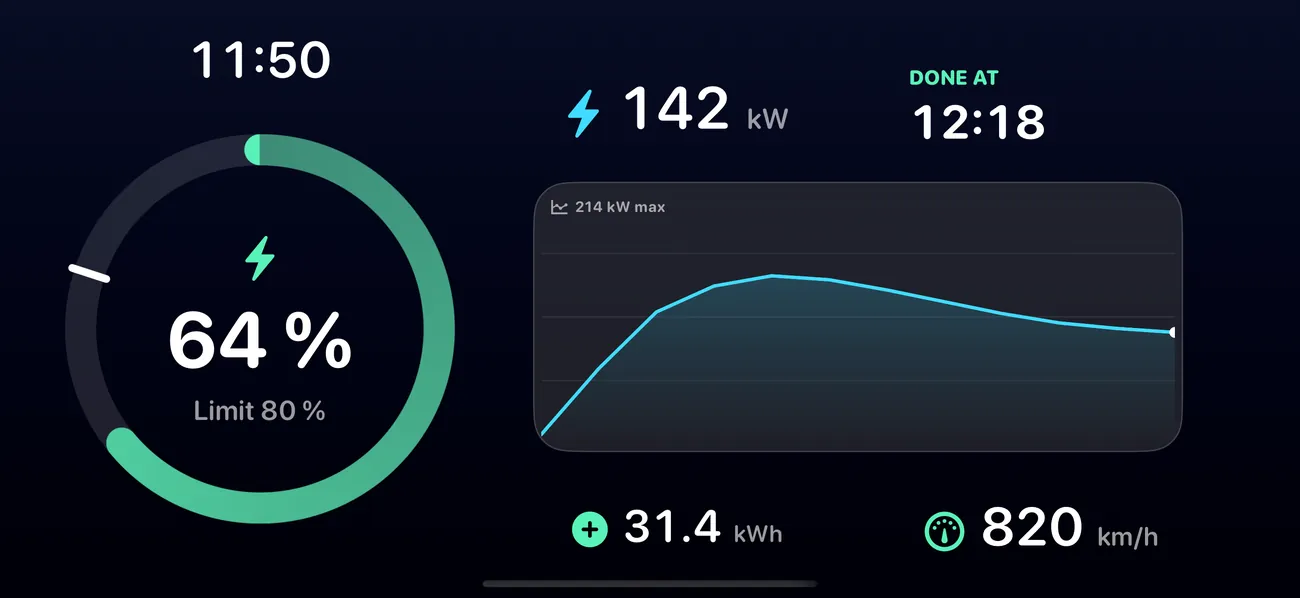
Step 3
As soon as your Tesla charges, you see your layout with the real values.
OBD in your own cockpit
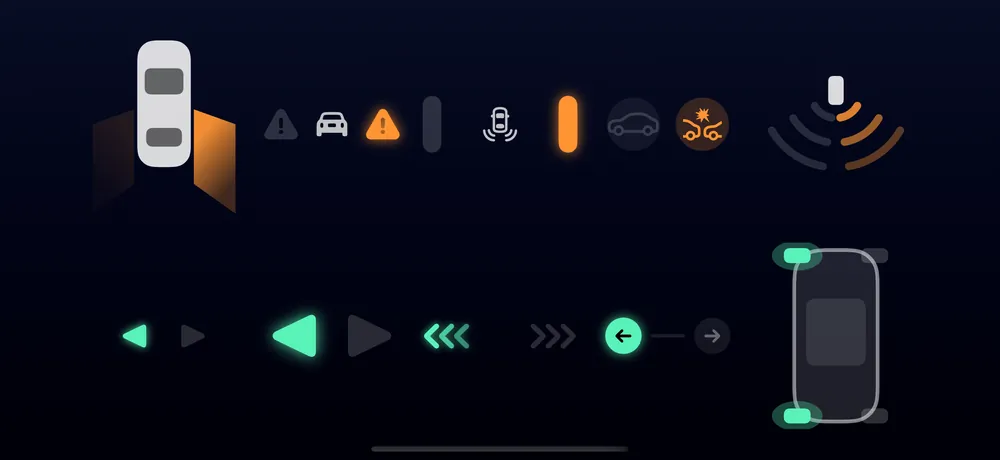
With a Vgate OBD adapter, more blocks become available: Blind spot in 5 looks, Indicators in 5 looks, Lights and the Speed limit. The “Assist” template brings them together in one cockpit.
Without OBD values, these blocks stay invisible in the cockpit. While editing they appear with sample values and an orange OBD badge. Under “Edges” you can also have the bottom edge of the cockpit light up red when you brake, and with OBD the sides when you indicate.
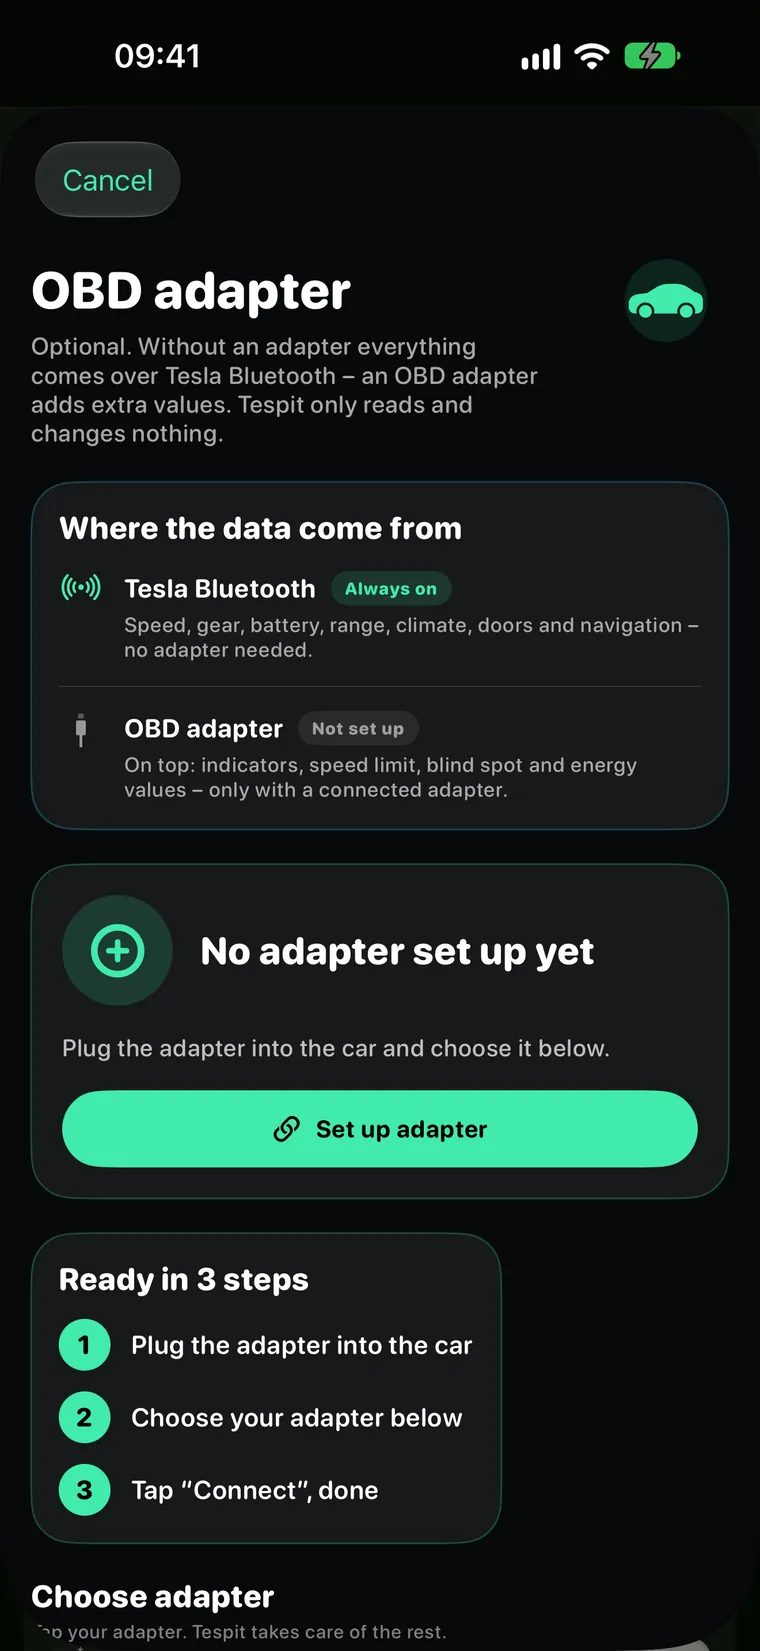
The OBD menu is new too. It first shows how the data flows: Tesla Bluetooth always runs, the OBD adapter is an optional addition. Below that follow connection, setup and a card of its own for the speed source.
G-force
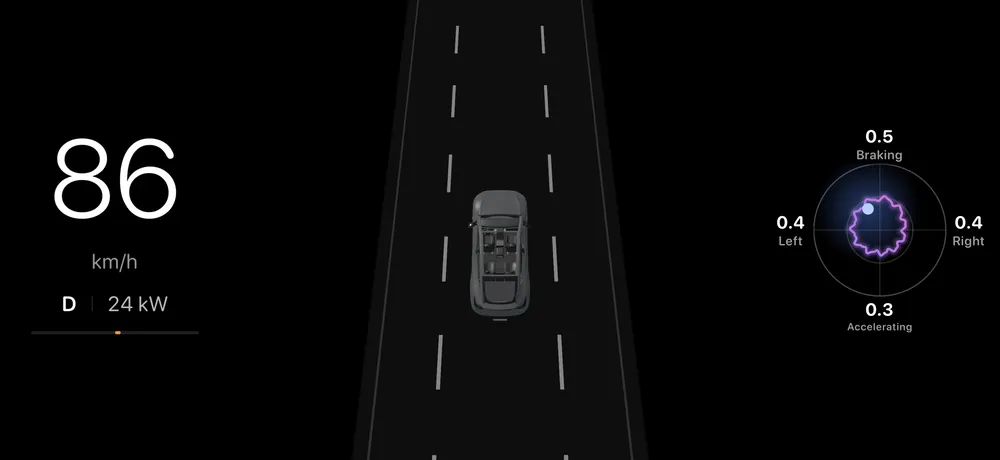
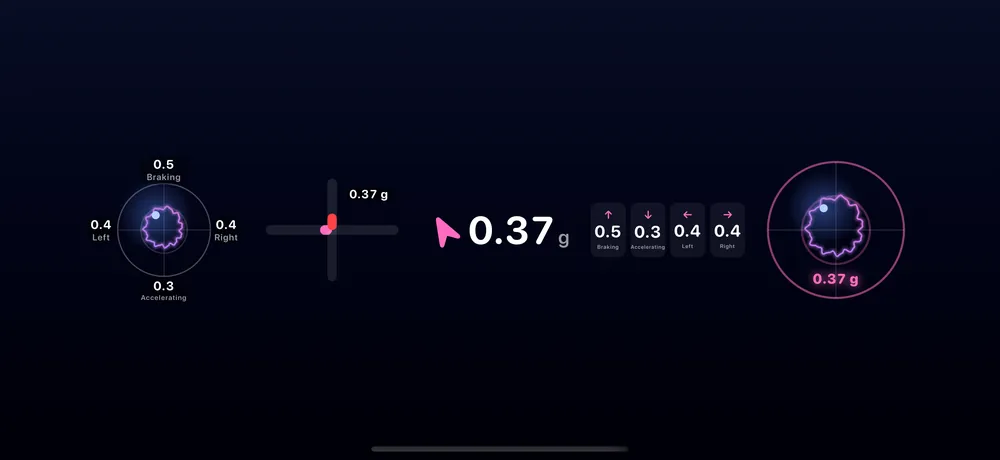
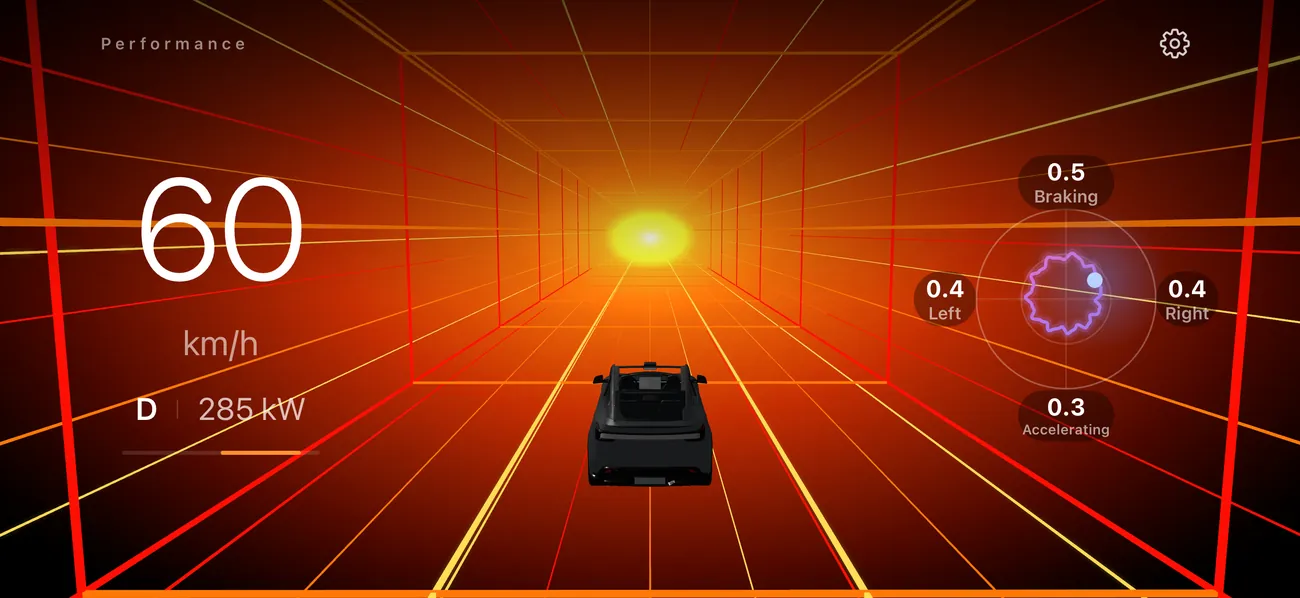
Tespit measures acceleration, braking and cornering with your phone's sensors. What's shown is the force you feel: when braking the dot moves forward, in a left-hand turn it moves to the right.
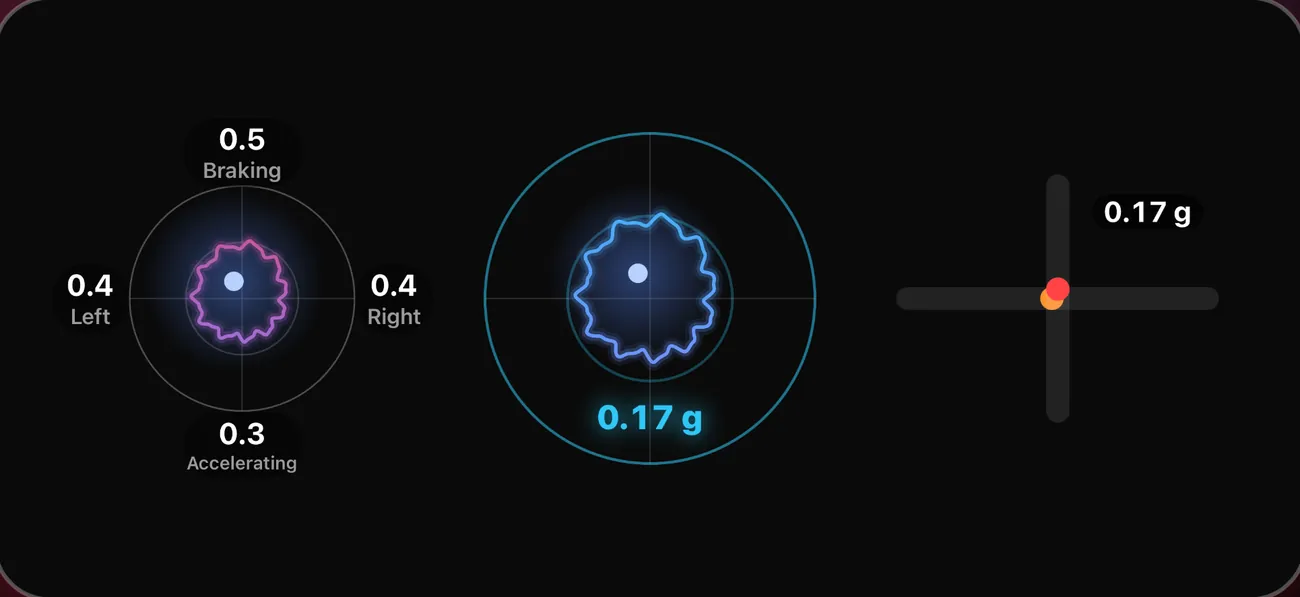
G-force is available as a block in 5 looks: bullseye, axes, number with arrow, peak values and neon. It's also included in the Performance cockpit and in the “Driving dynamics” template.
While you drive, Tespit records your forces. Under Settings › Cockpit › “G-force history” you choose the outline, the trail or “Off”. The outline is a closed line around the strongest forces in each direction, the trail shows the whole path. The next trip starts again from zero.
Performance cockpit
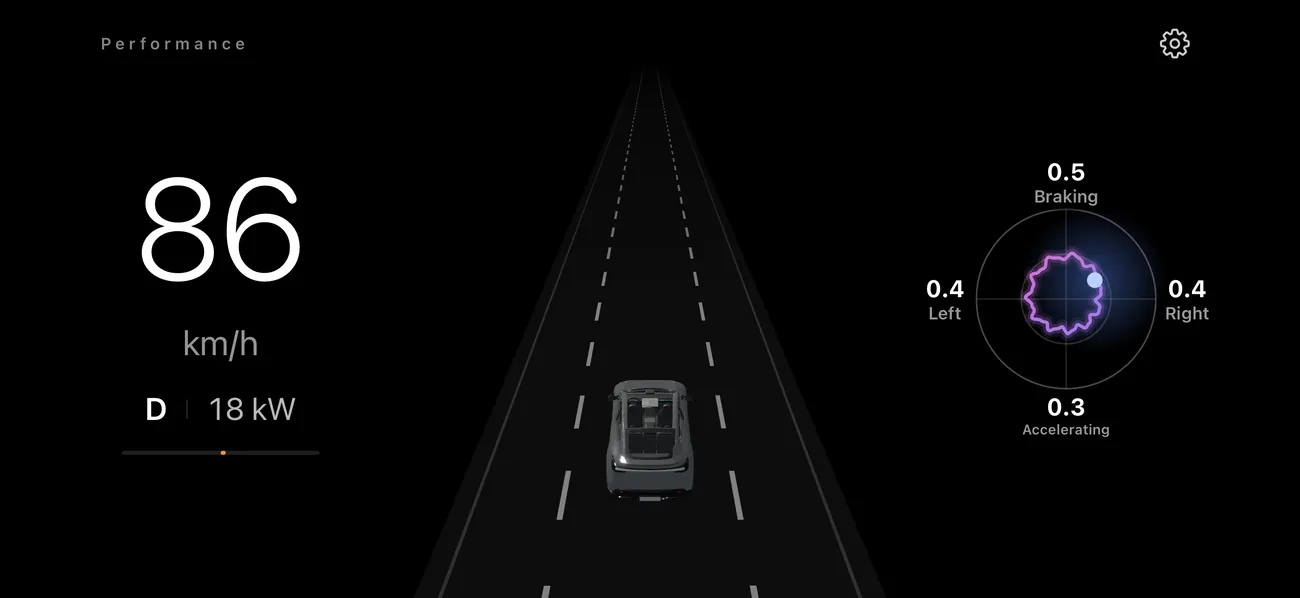
In landscape, the Performance cockpit is now split into three: speed, gear and power on the left, your car in the middle, G-force on the right.
When you hit the accelerator, a large field glows behind the car, and beams of light run around it all the way to the edge of the screen. When this happens is up to you, under Settings › Cockpit › Acceleration animation: only from a standstill, which is the default, or also while driving.
Vehicle center
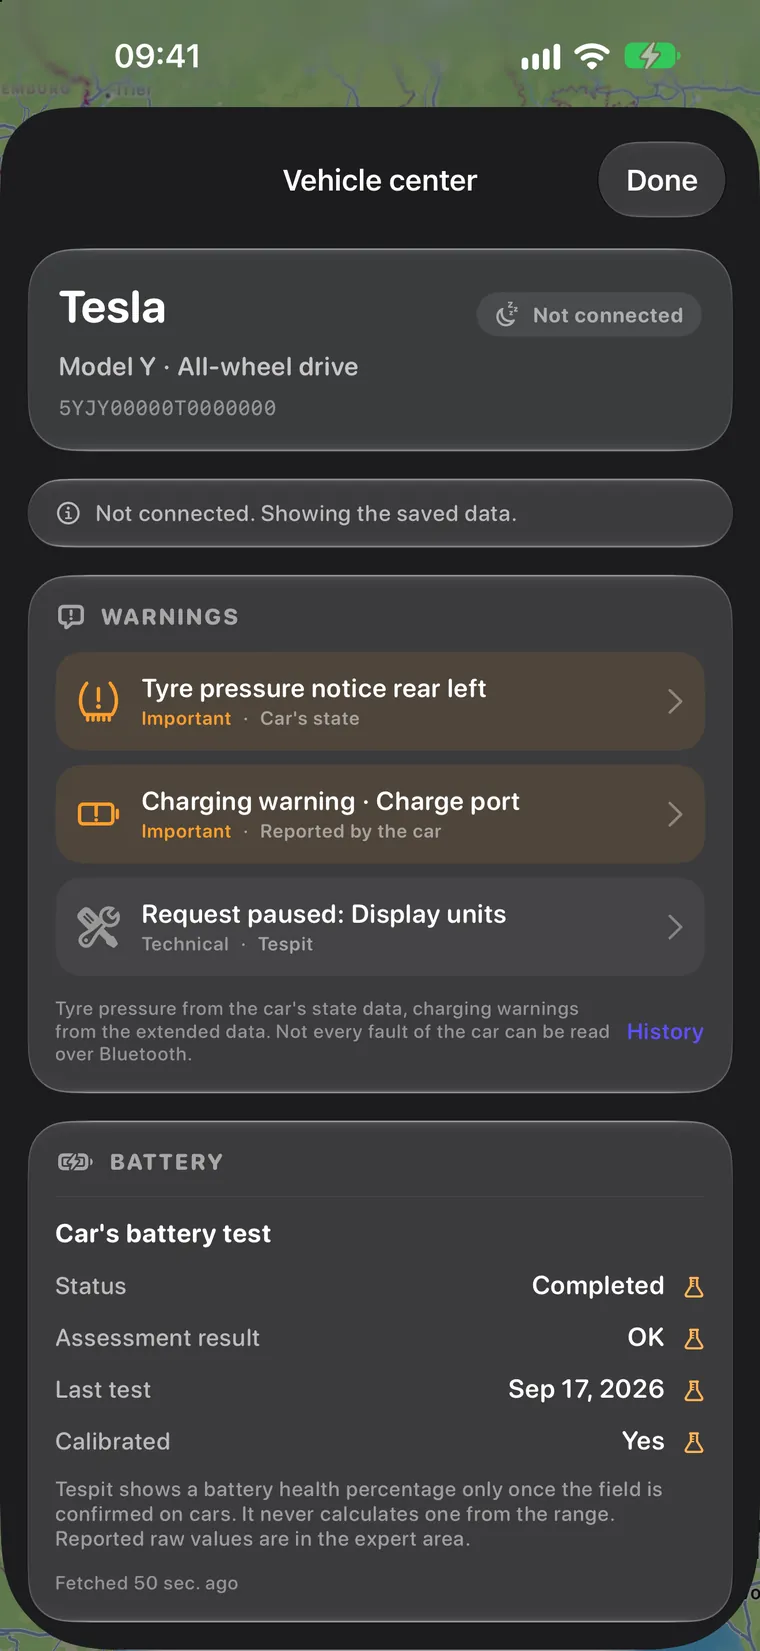
Every paired car now has its own Vehicle center. There you see current warnings and their history, plus the battery test, the software version and the equipment. You'll find it under Settings › Vehicle › your car › “Vehicle center”.
Tespit doesn't estimate anything here. What the car doesn't provide isn't shown. The history stays on your phone, and you can switch it off and delete it for each car.
Step 1
Open the Vehicle center while your car is connected and in P. Tespit only reads new data then, and only as long as the page is open.
Step 2
Tap “Read extended vehicle data” and confirm. This data is not in Tesla's published protocol and is therefore experimental. You switch it on for each car individually.
Step 3
Tespit queries one category after another. Trip data takes priority. If the car doesn't answer twice, Tespit pauses that category for 24 hours. You can try again manually.
Warning lights
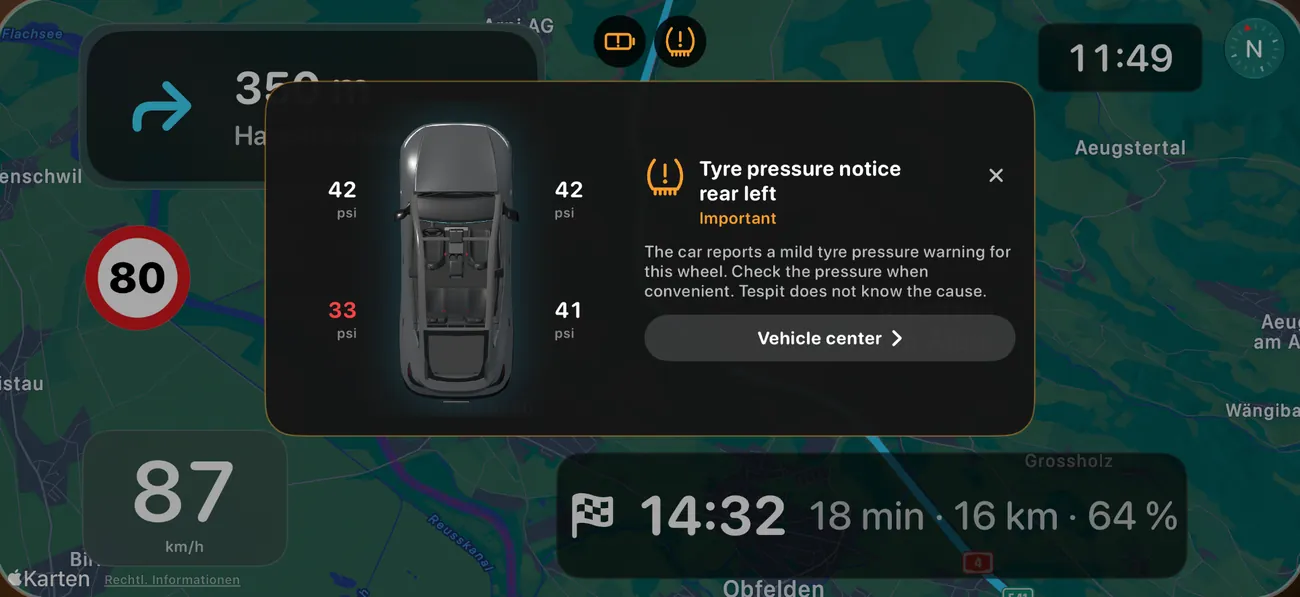
Tyre pressure and charging warnings from your car appear as a light in the cockpit, modelled on the displays in the Tesla. A tap shows what they mean, for tyre pressure with your car from above in 3D. After 10 seconds without input the preview disappears again.
In the Toolbox there is the “Vehicle warnings” block for this, in several looks.
Route overview
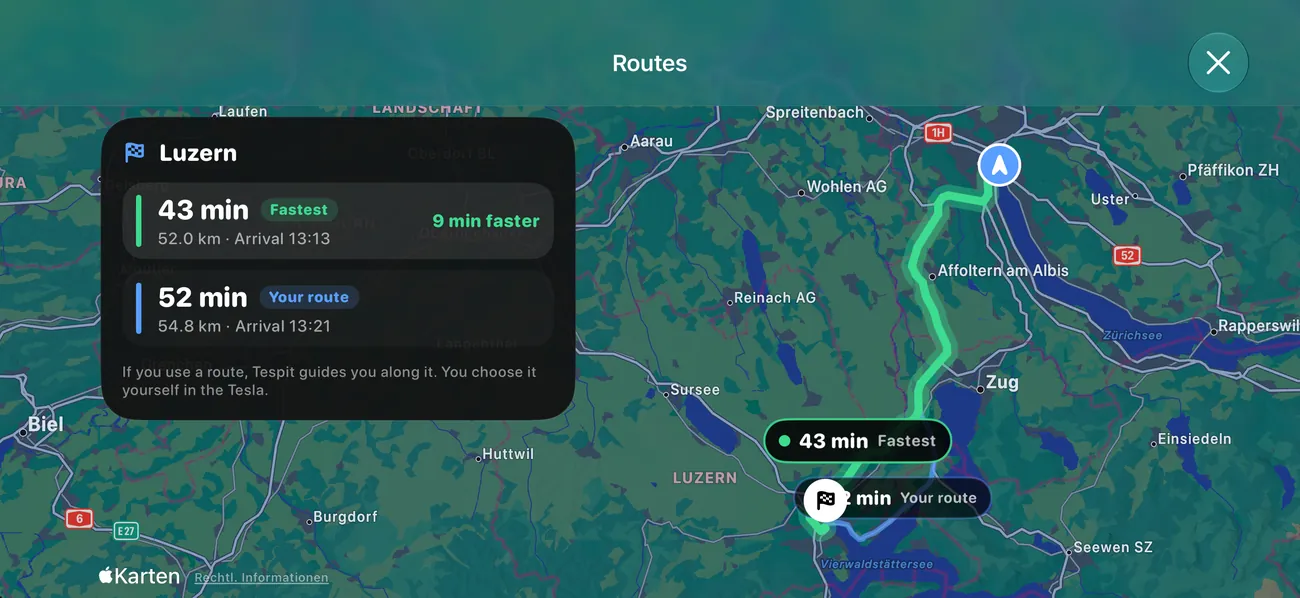
While your Tesla is navigating, Tespit calculates alternatives to the same destination. The overview shows them on a dark map with time, distance, arrival and the difference from your route. In landscape the list sits at the side, so the routes stay clear.
If a route is clearly faster, a notice appears at the top of the cockpit. By default, this applies from 3 minutes and 8 percent saved. On iPhone Tespit checks every 3 minutes, on Android every 10 minutes.
Step 1
Enter your destination in the car as usual. As soon as it's navigating, the “Routes” button appears in the cockpit's quick buttons.
Step 2
Tap “Routes”, or “Show” in the notice. Choose a route in the list to highlight it on the map.
Step 3
With “Use this route”, Tespit's line and instructions follow that route. In the Tesla you choose it yourself. If you continue on Tesla's route, Tespit follows the car again.
Step 4
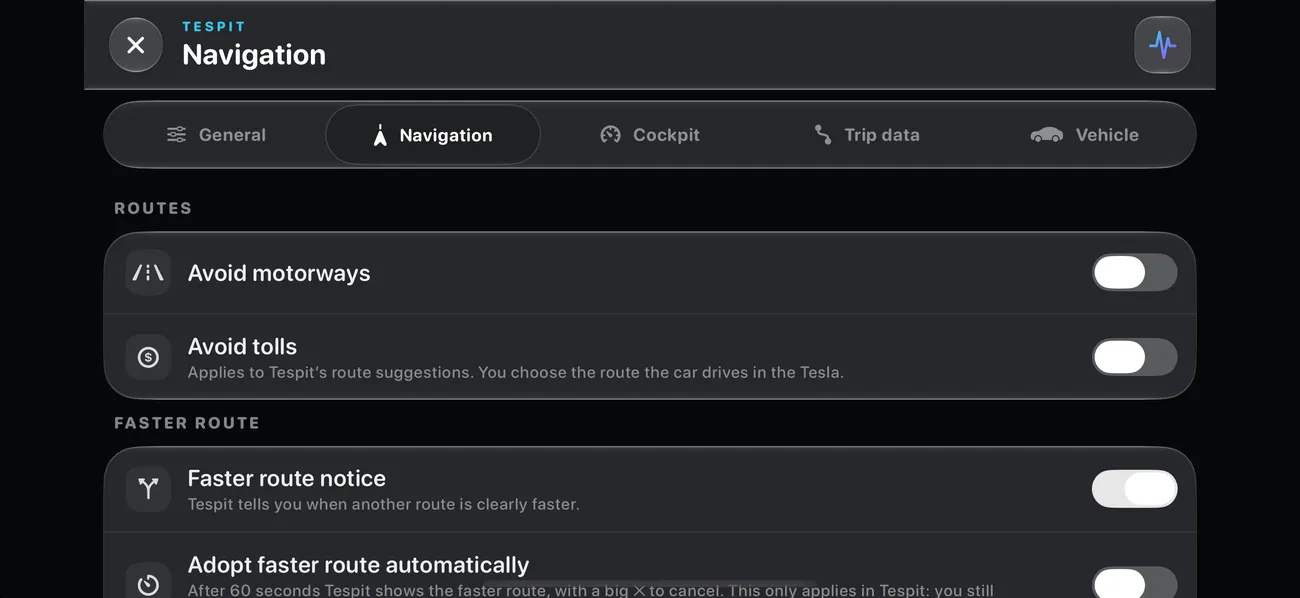
Under Settings › Navigation you switch the notice on or off and set the threshold yourself, 1 to 30 minutes and 1 to 30 percent. “Avoid motorways” and “Avoid tolls” are there and also as a quick setting in the cockpit.
Font size
You can now set the font size for individual elements, from 50 to 130 percent, in your own cockpits and in the 11 cockpits. The element keeps its place and size, only the text grows, as far as its line has room.
Step 1
In your own cockpit: “Edit” and tap the element. In the 11 cockpits: tap the cockpit, choose “Arrange” and tap or drag the element.
Step 2
Drag the “Font size” slider. A tap on the percentage resets it to 100 percent.
Trip data
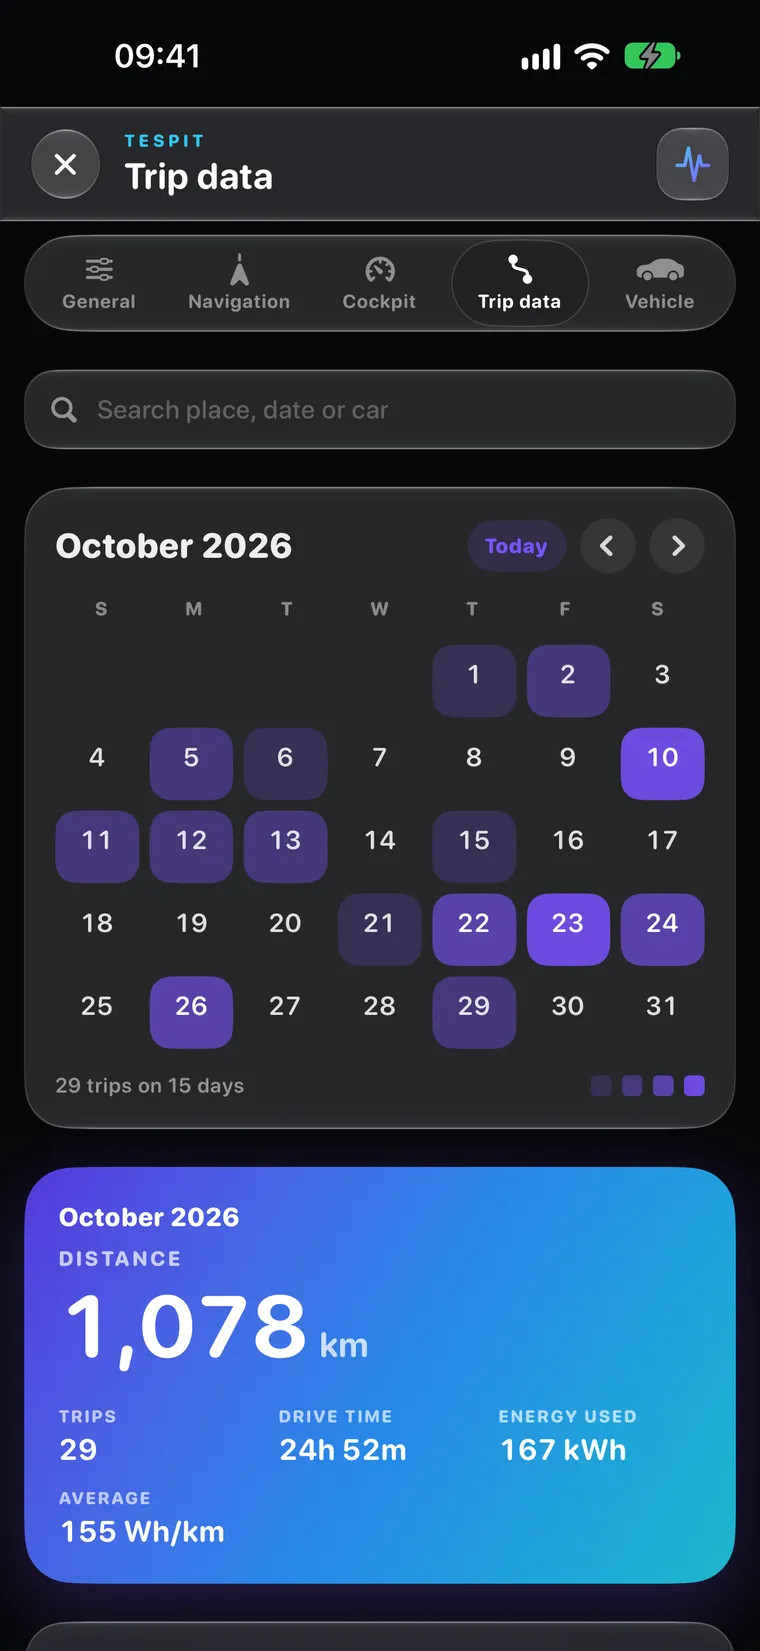
The Trip data tab now has a monthly calendar. Days with trips are coloured by kilometres. If you tap a day, you see only that day. Export and review always apply to the month or day shown.
Search finds all trips by place, vehicle name or date, for example “Lucerne October” or “Saturday”. Every new trip also saves the G-force: you see the circle with the peak values and a chart over time.
Trip data is switched off by default and stays on your device.
3D car
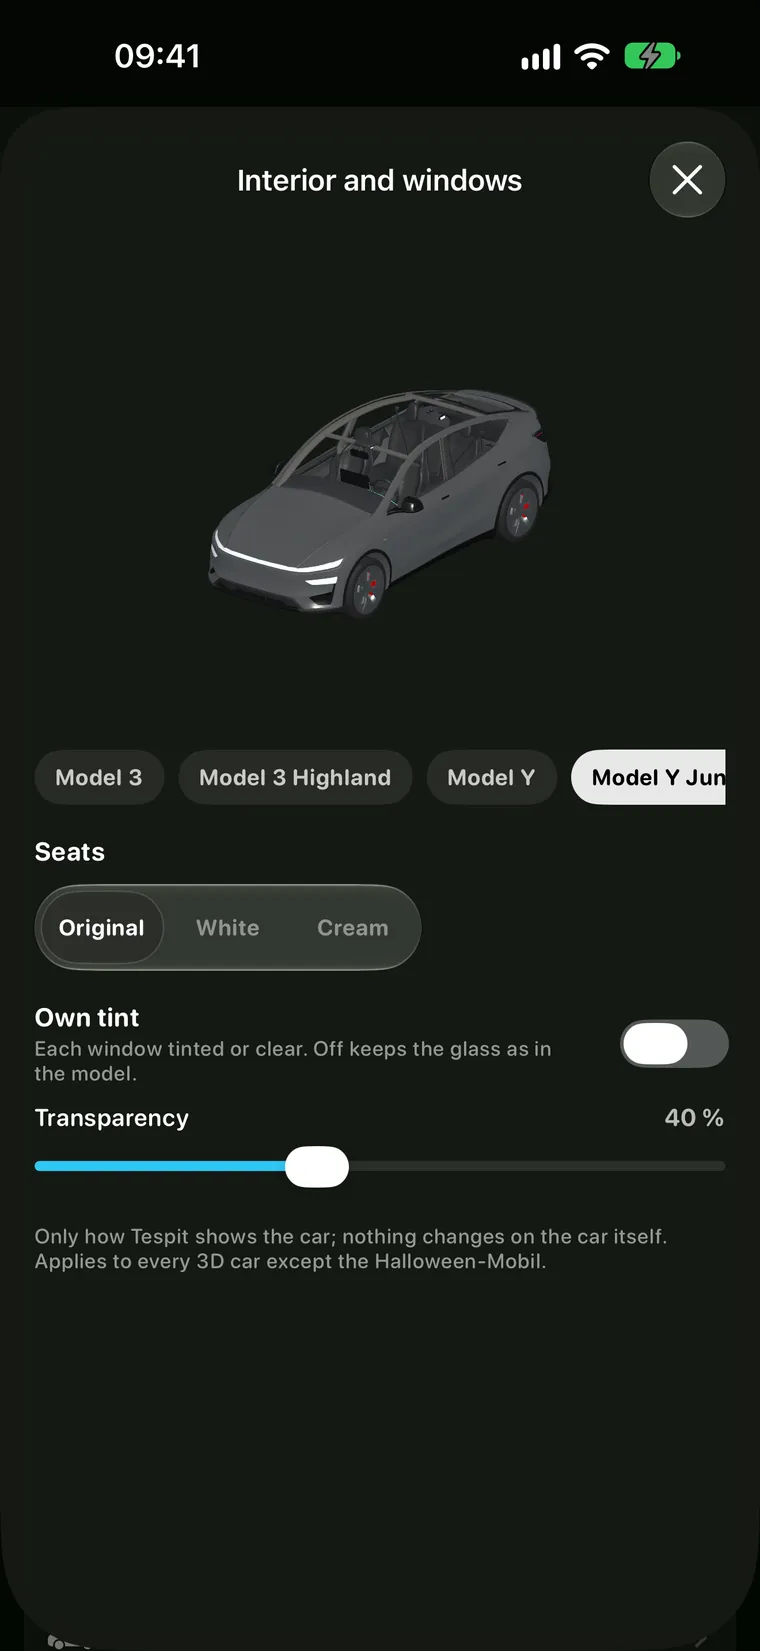
Under Settings › Vehicle › “Interior and windows” you choose the seat colour: Original, White or Cream. With “Own tint” you decide individually for the windshield, front side windows, rear side windows, rear window and glass roof whether they're tinted. The “Transparency” slider sets, from 0 to 100 percent, how far you can see through.
This is only the display in Tespit, nothing changes on the car. Below the preview you can look at each of the 7 models.
Your wishes from the TFF Forum
Thanks to everyone in the TFF Forum for your feedback. Many points in this post go back to you. On top of that come these improvements:
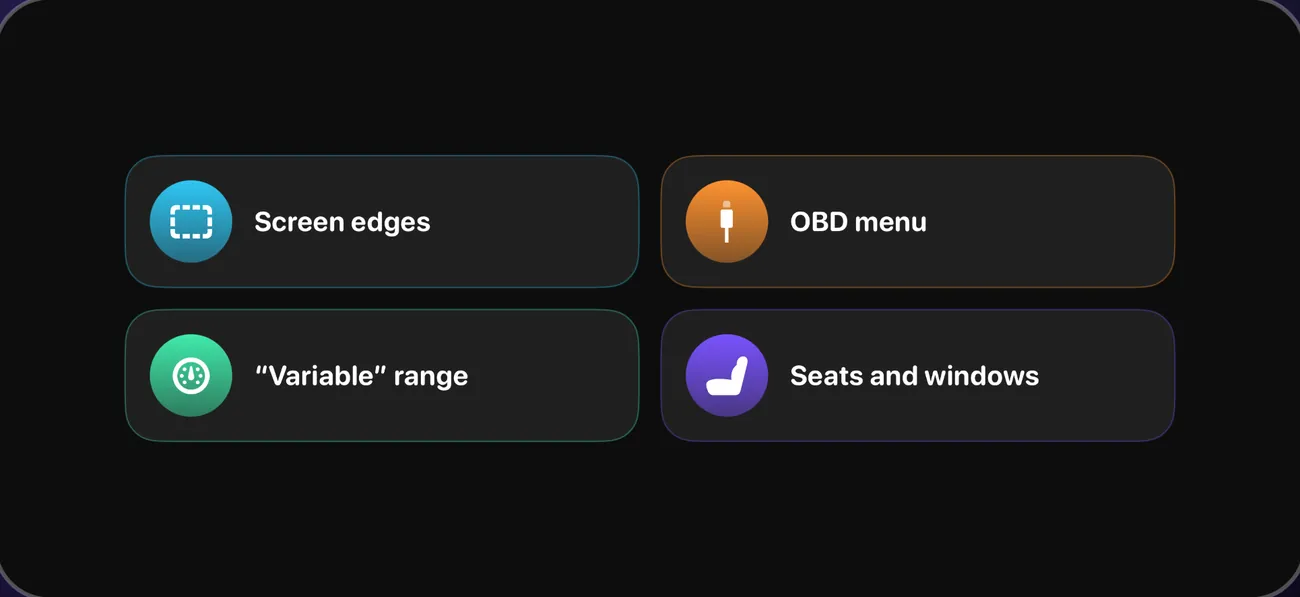
Original recordings from an iPhone running Tespit 1.1.17, with sample values. The Android app has the same features, but its appearance may differ slightly.
The update is coming for iPhone and Android. Your own cockpits and OBD are part of Tespit Premium.